I’ve had an idea in my brain for quite some time to finish a quilt with a wide binding. I wanted the binding to act like a frame for my finished quilt. In stark contrast to my recent quilts finished with a faced edge (tutorial here), this wide binding finishes 1 inch wide and makes a statement! Tutorial (and lots of pictures) below:
Step 1: Trim the quilt leaving 3/4 inch of extra batting/backing around the entire perimeter. An important detail, not pictured, using a 1/4 inch seam, stitch around the perimeter to secure the batting to the backing. This will help ensure the batting does not bunch up or shift in the finished wide binding.
Step 2: Measure the perimeter of the quilt. Determine the number of binding strips needed by taking the perimeter measurement, divide by 40, and add 1. For example, if the trimmed quilt measures 60 x 80 inches, the perimeter measurement is 60 + 60 + 80 + 80 = 280 inches. Next, 280 ÷ 40 = 7 + 1 = 8 binding strips. The additional strip allows for the extra needed for the folding at the corners and to connect the (starting/ending) binding strips near the end of the process.
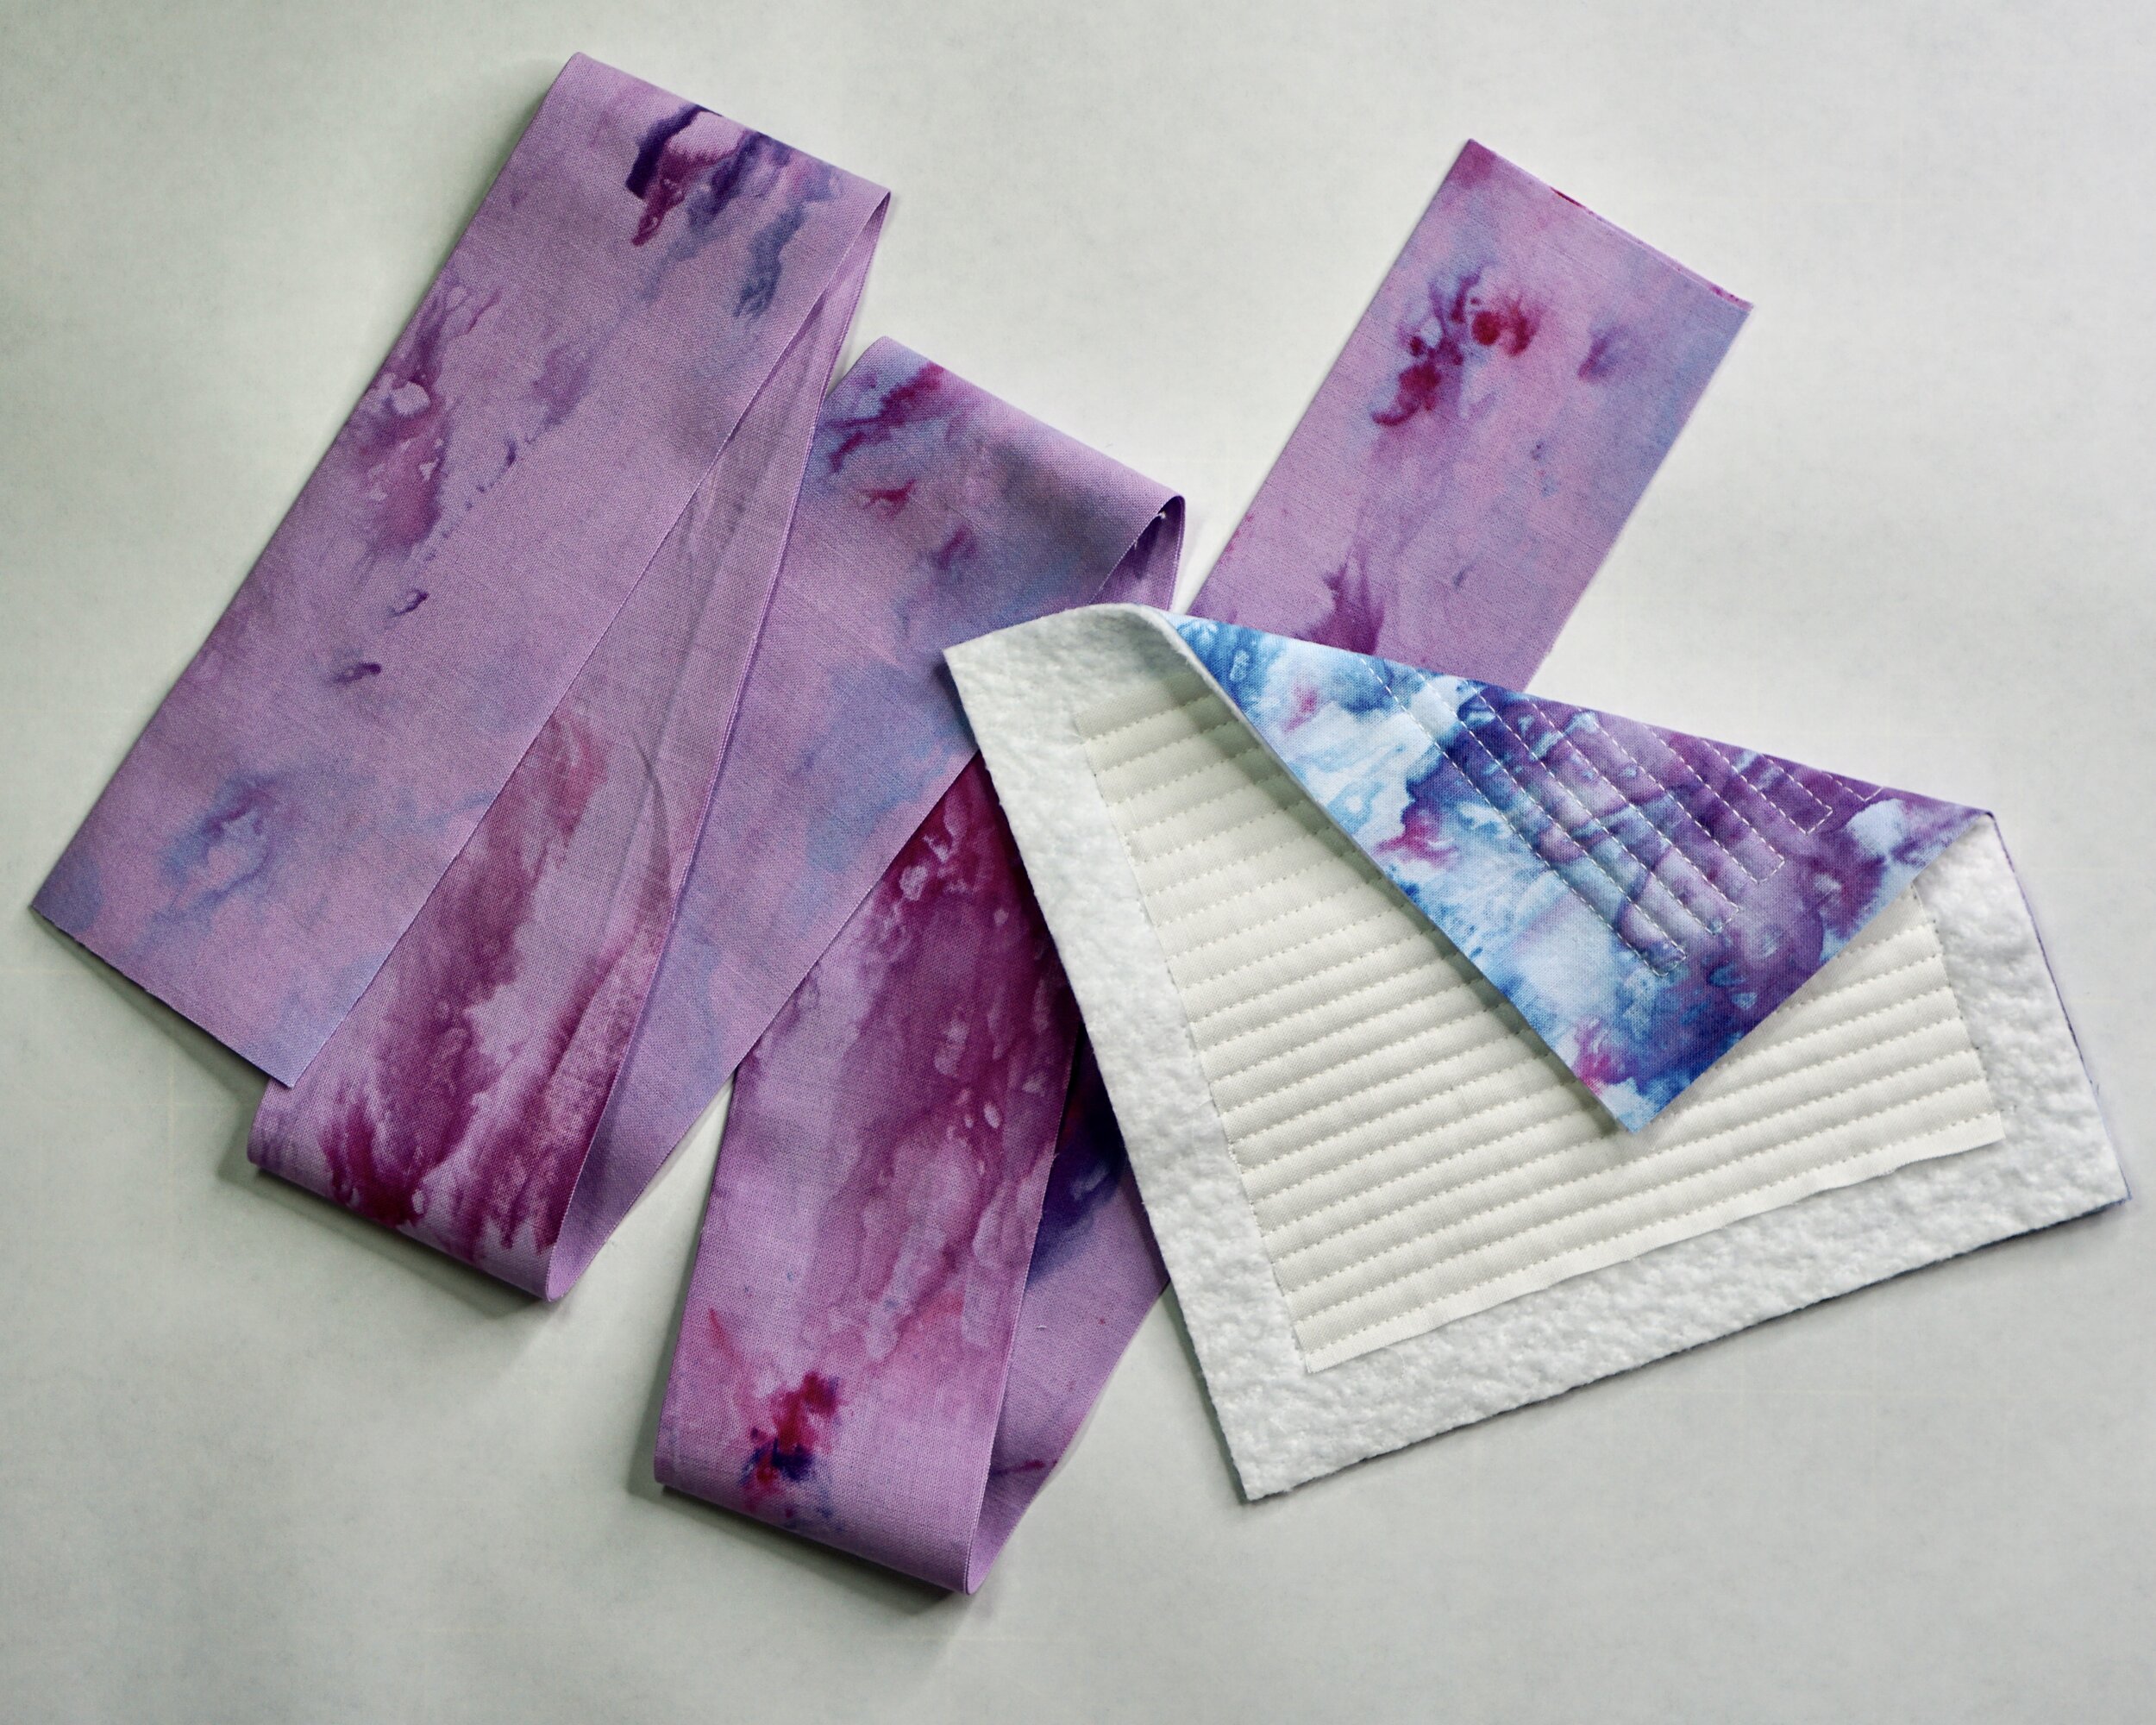
Step 3: Cut the required number of binding strips 5 inches x WOF. Join the strips together into one long continuous binding, preferably using a diagonal seams, pressed open.
Step 4: Fold the binding in half lengthwise and press. I like to have a nice crisp fold, so I used a little spray starch when pressing the fold.

Step 5: Align the raw edges of the binding strip with the edge of the quilt top as pictured. Sew the binding strip to the quilt top using a 1/4 inch seam. Leave a 8-10 inch tail of extra binding when you start stitching. Backstitch at the start and end of all seams in this tutorial. As you approach the corner of the quilt top, slow down, and stop stitching 1/4 inch before the corner is reached. You want to have 1/4 inch of unstitched space at the corner of your quilt top. Backstitch at the end of the seam.
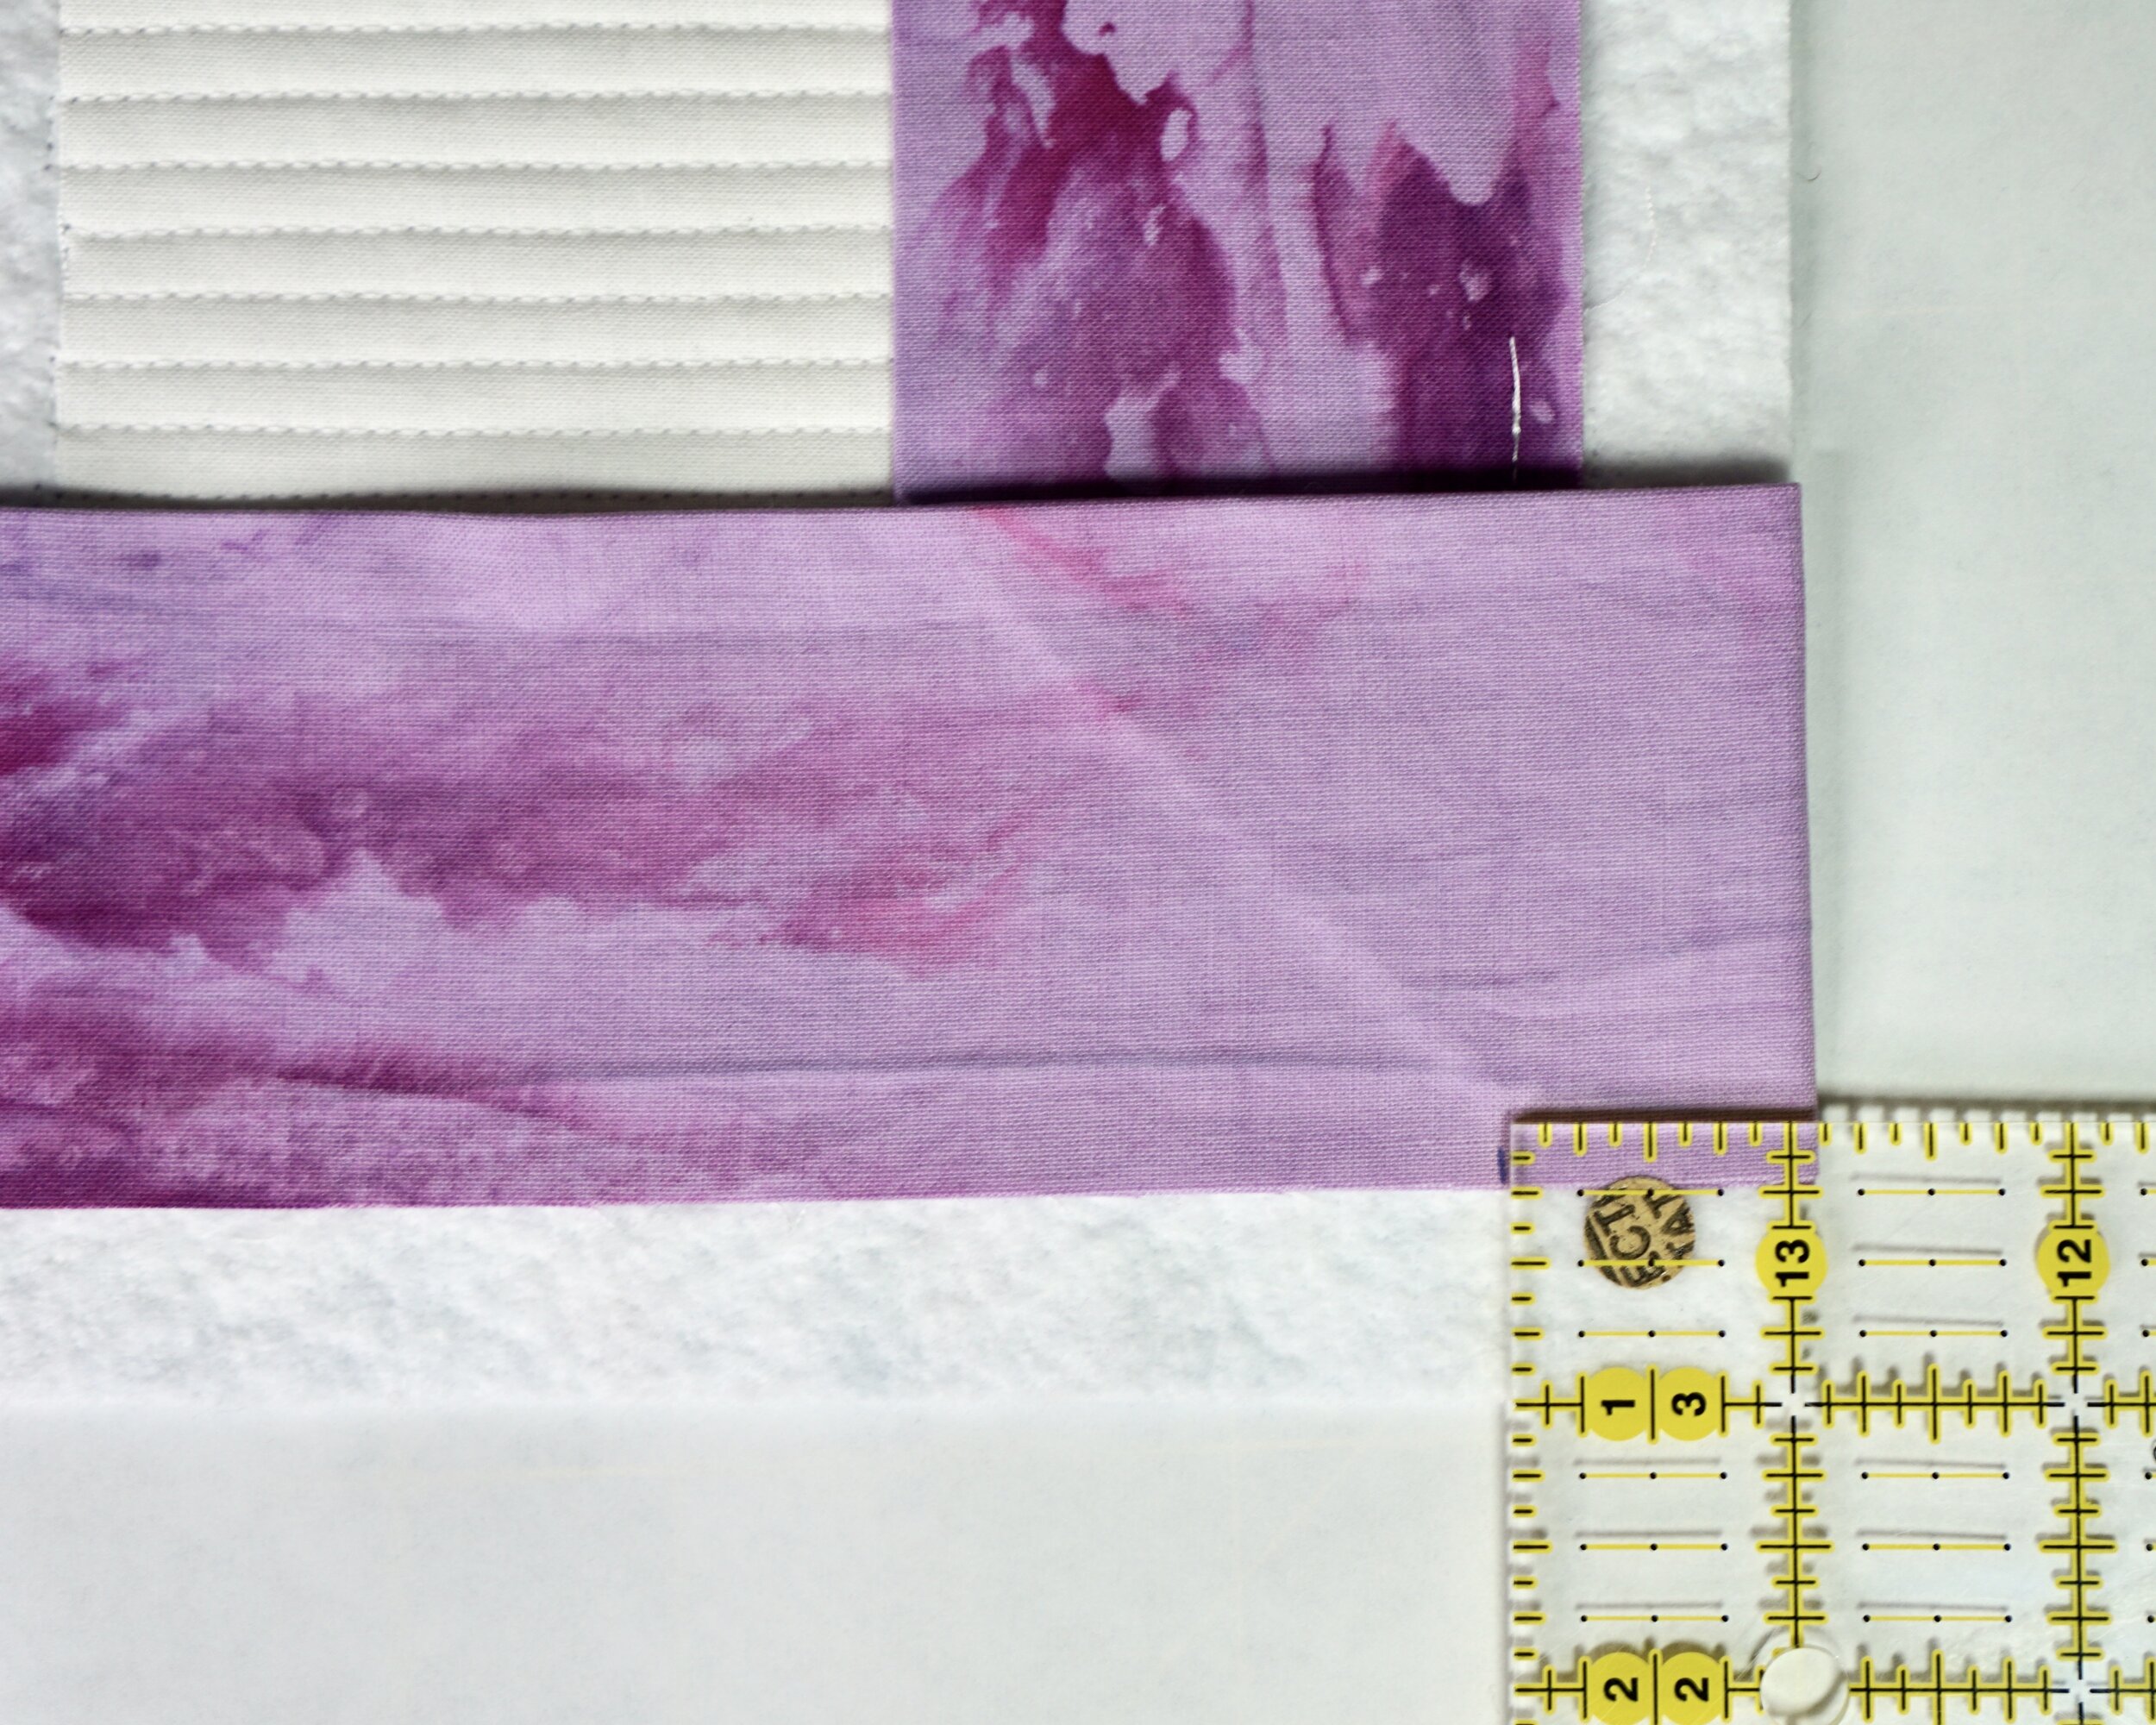
Step 6: Measure 2 1/4 inches from the end of the stitching line down the strip and make a small mark. The mark will be hidden in the seam allowance. I used a Pilot Frixion pen here, which (should) disappear when pressed. A small pencil mark or a chalk mark would also work. This mark will be used as a reference point later in the process.

Step 7: Fold the binding to the right as seen below. A diagonal fold (45° angle) is created. Follow the invisible diagonal line, and you’ll see it points right to the corner of the quilt. This is how you know the fold is accurate and precise. This folding technique will produce a mitered corner.

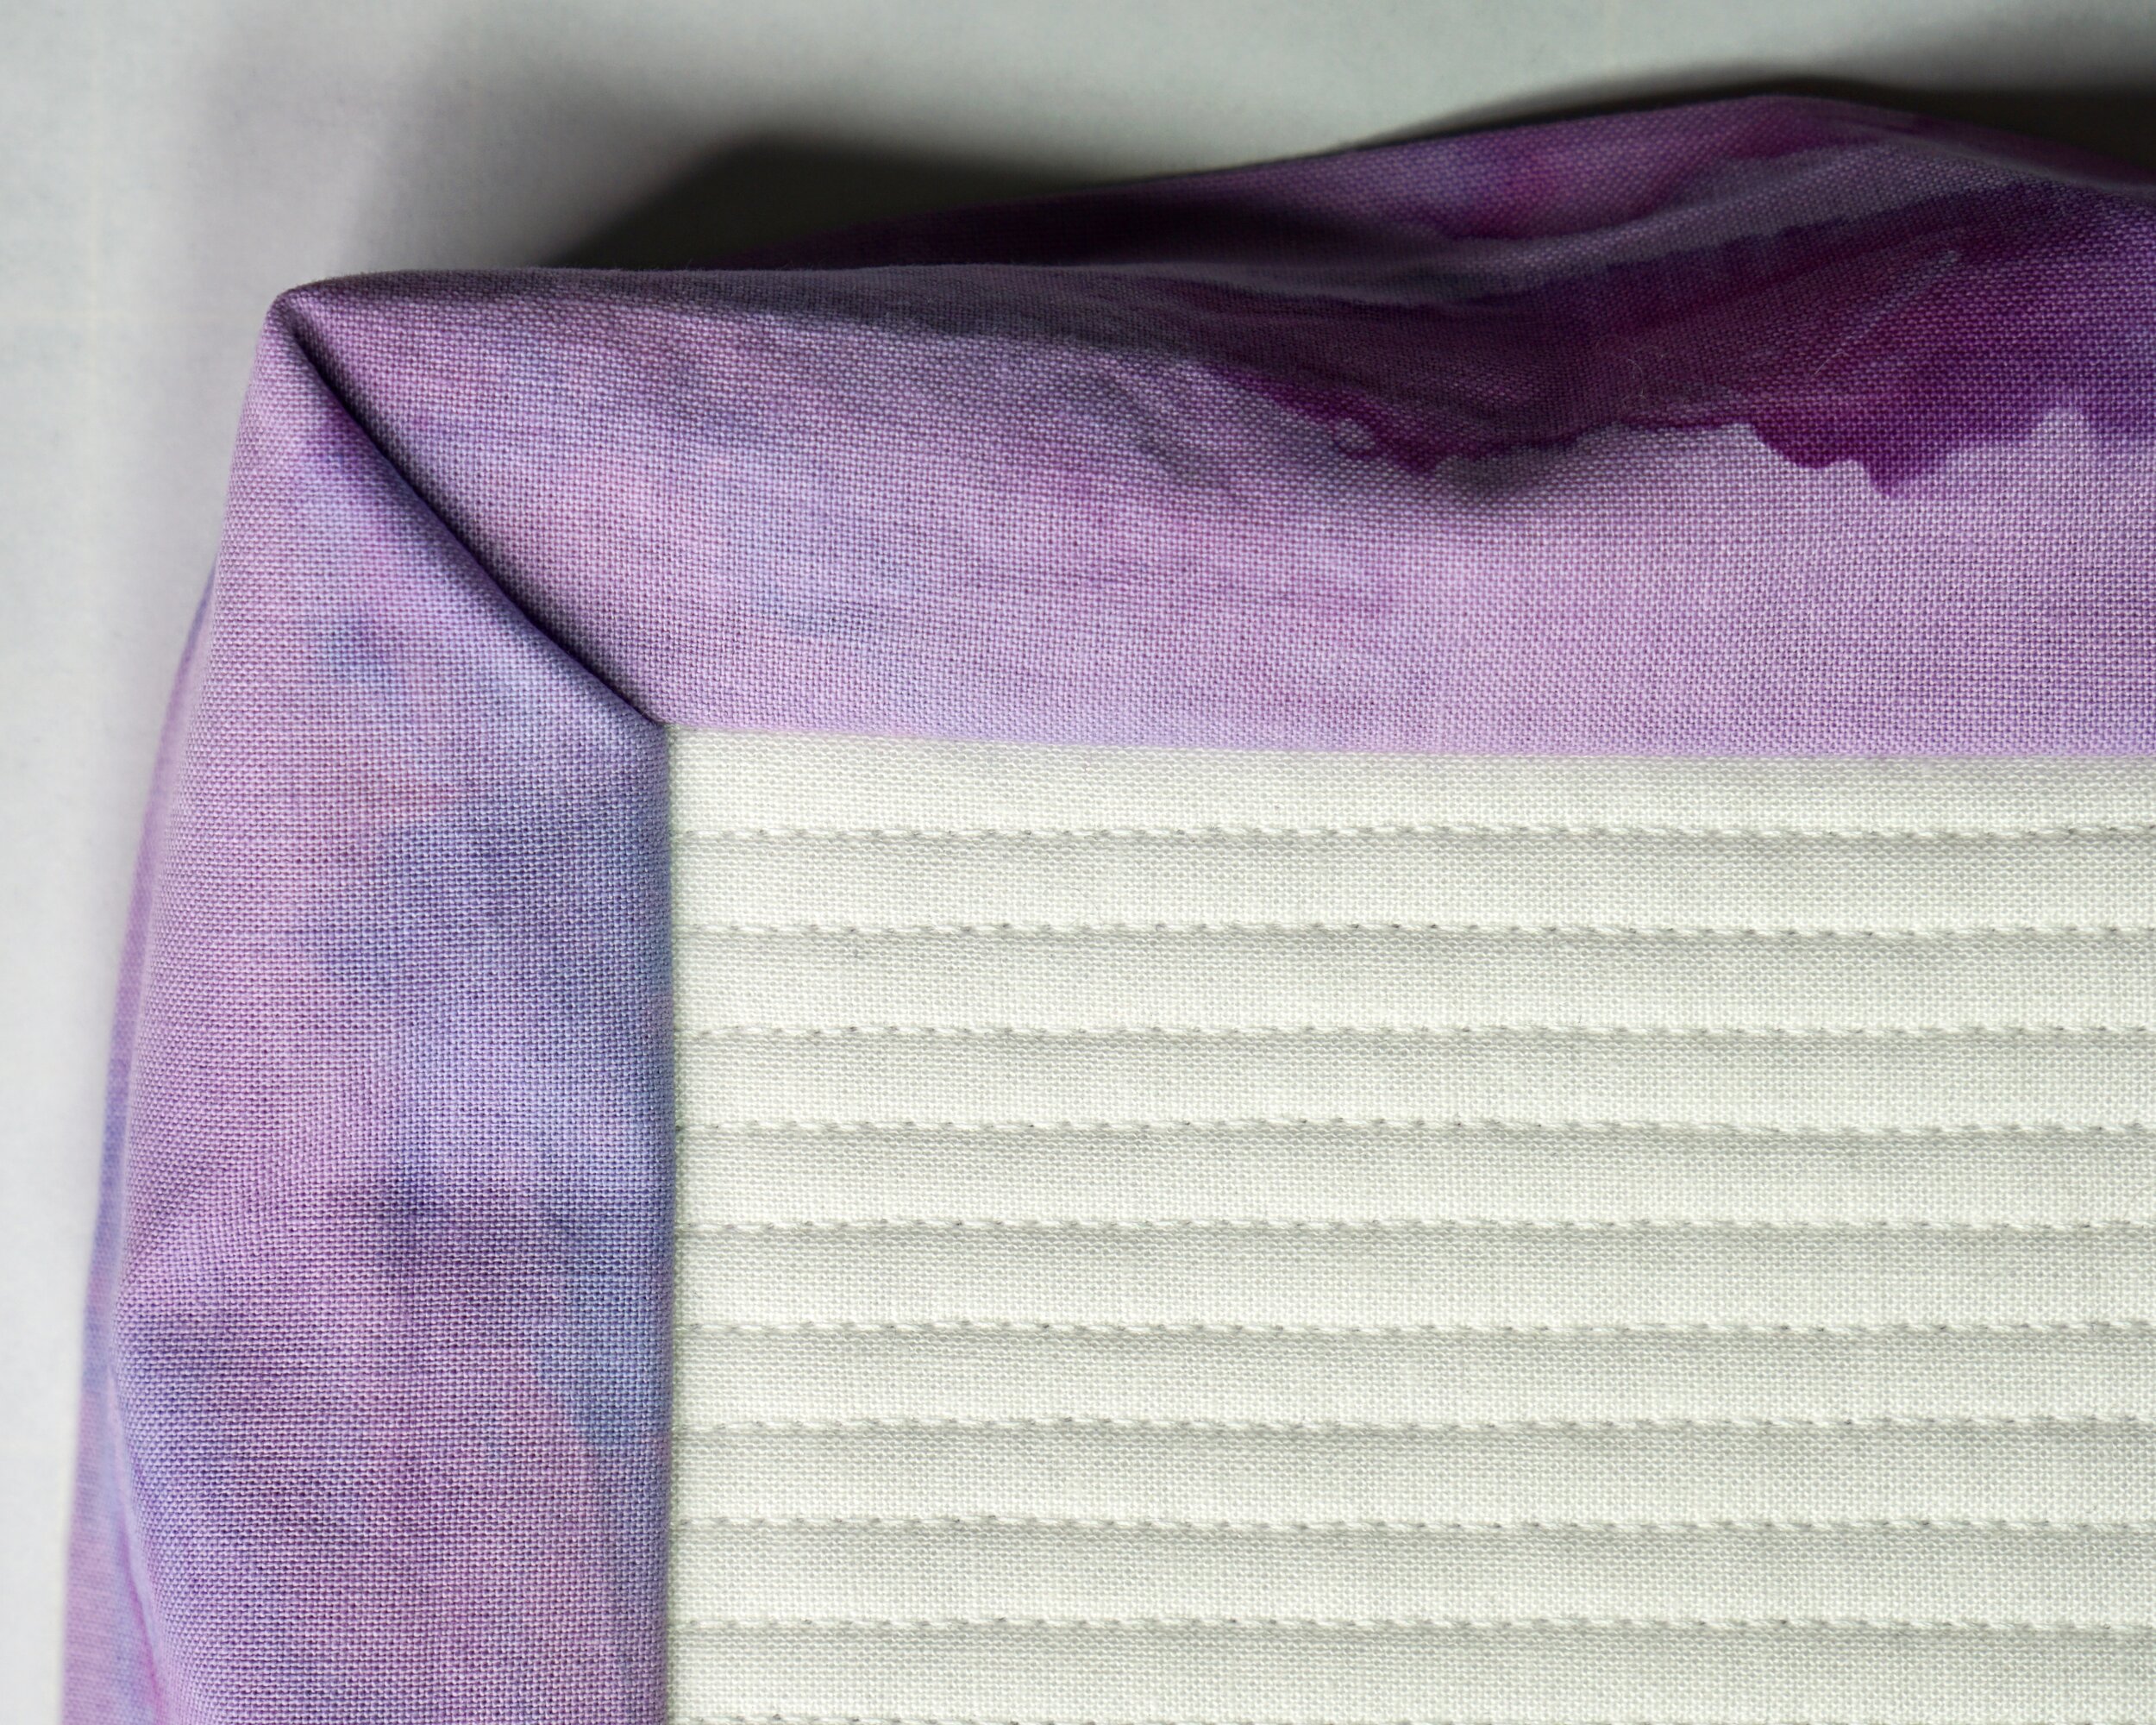
Step 8: Maintaining the 45 degree fold, take the strip and fold it back to the left, lining up the new fold with the edge of the batting/backing. (You can see the imprint of the diagonal fold in the strip below.) Using the mark made in Step 6, check the measurement. This is the mark where the new stitching line will begin. It measures one inch from the edge, which takes account for the 3/4 inch batting/backing plus 1/4 inch into the quilt top. Just as the stitching stopped 1/4 inch before the end of the quilt top in Step 5, the next stitching line will begin 1/4 into the quilt top. It’s important to backstitch to secure the stitches at the corner of the quilt.
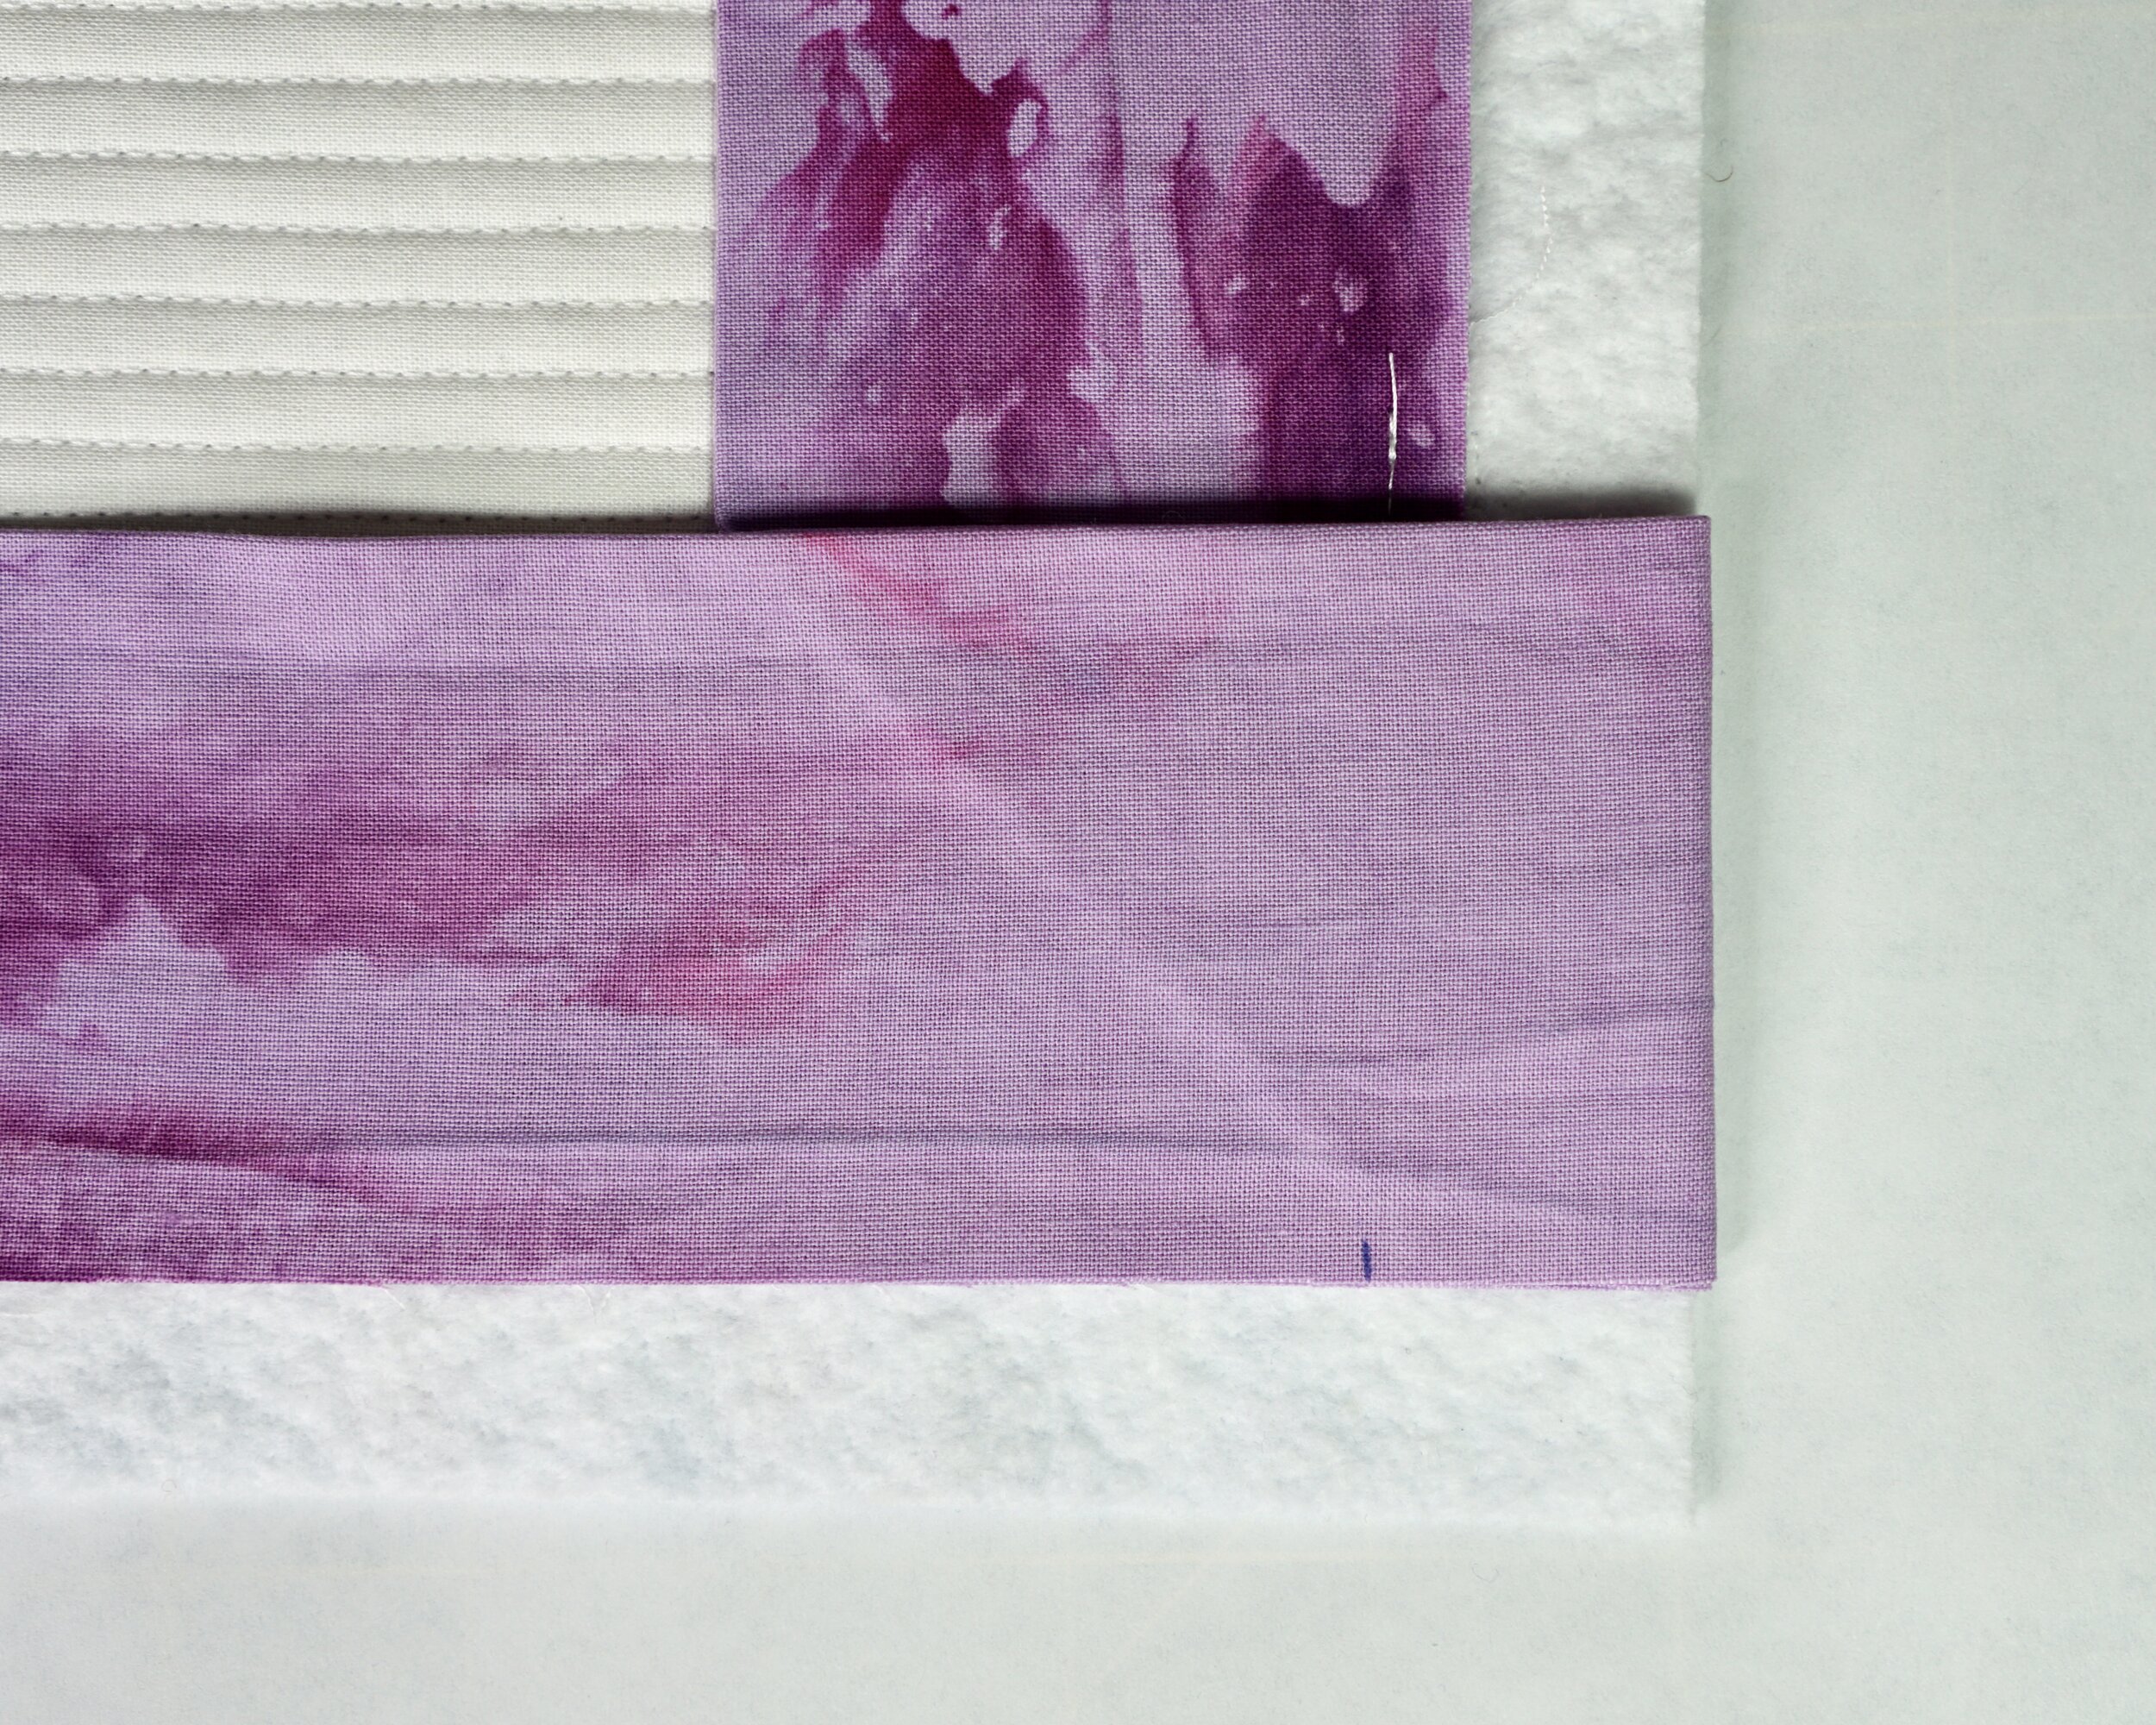
I will quickly check my diagonal fold to make sure I don’t have any unexpected creases or bunching of the fabric before I start sewing the next strip. The picture below is shown as a reference of the diagonal line point right towards the corner. Return to the prior fold positioning before stitching the next seam.

Step 9: Start stitching (and backstitch) starting at the mark. Continue until the next corner approaches, and stop stitching 1/4 inch before the corner of the quilt top as before. Backstitch at this stopping point.

Step 10: Measure 2 1/4 inches and make the reference mark. (Repeat of Step 6.)


Step 11: Repeat Steps 7-9 until all four corners are completed. When the original starting point is approaching, pause 12-14 inches before the original starting point, and join the two ends of the continuous binding strip. In this tutorial, I did a straight seam and pressed the seam open due to the size of the sample. In most cases, I will join the starting and ending point of the strips using a diagonal seam, pressing seams open. Once the strips are joined and seams pressed open, the remaining binding should lay flat against the quilt top. (If it does not lay flat, now is the time to adjust the joining seam.) Stitch the remaining binding down, overlapping the stitching line at the start and finish points for the final seam.


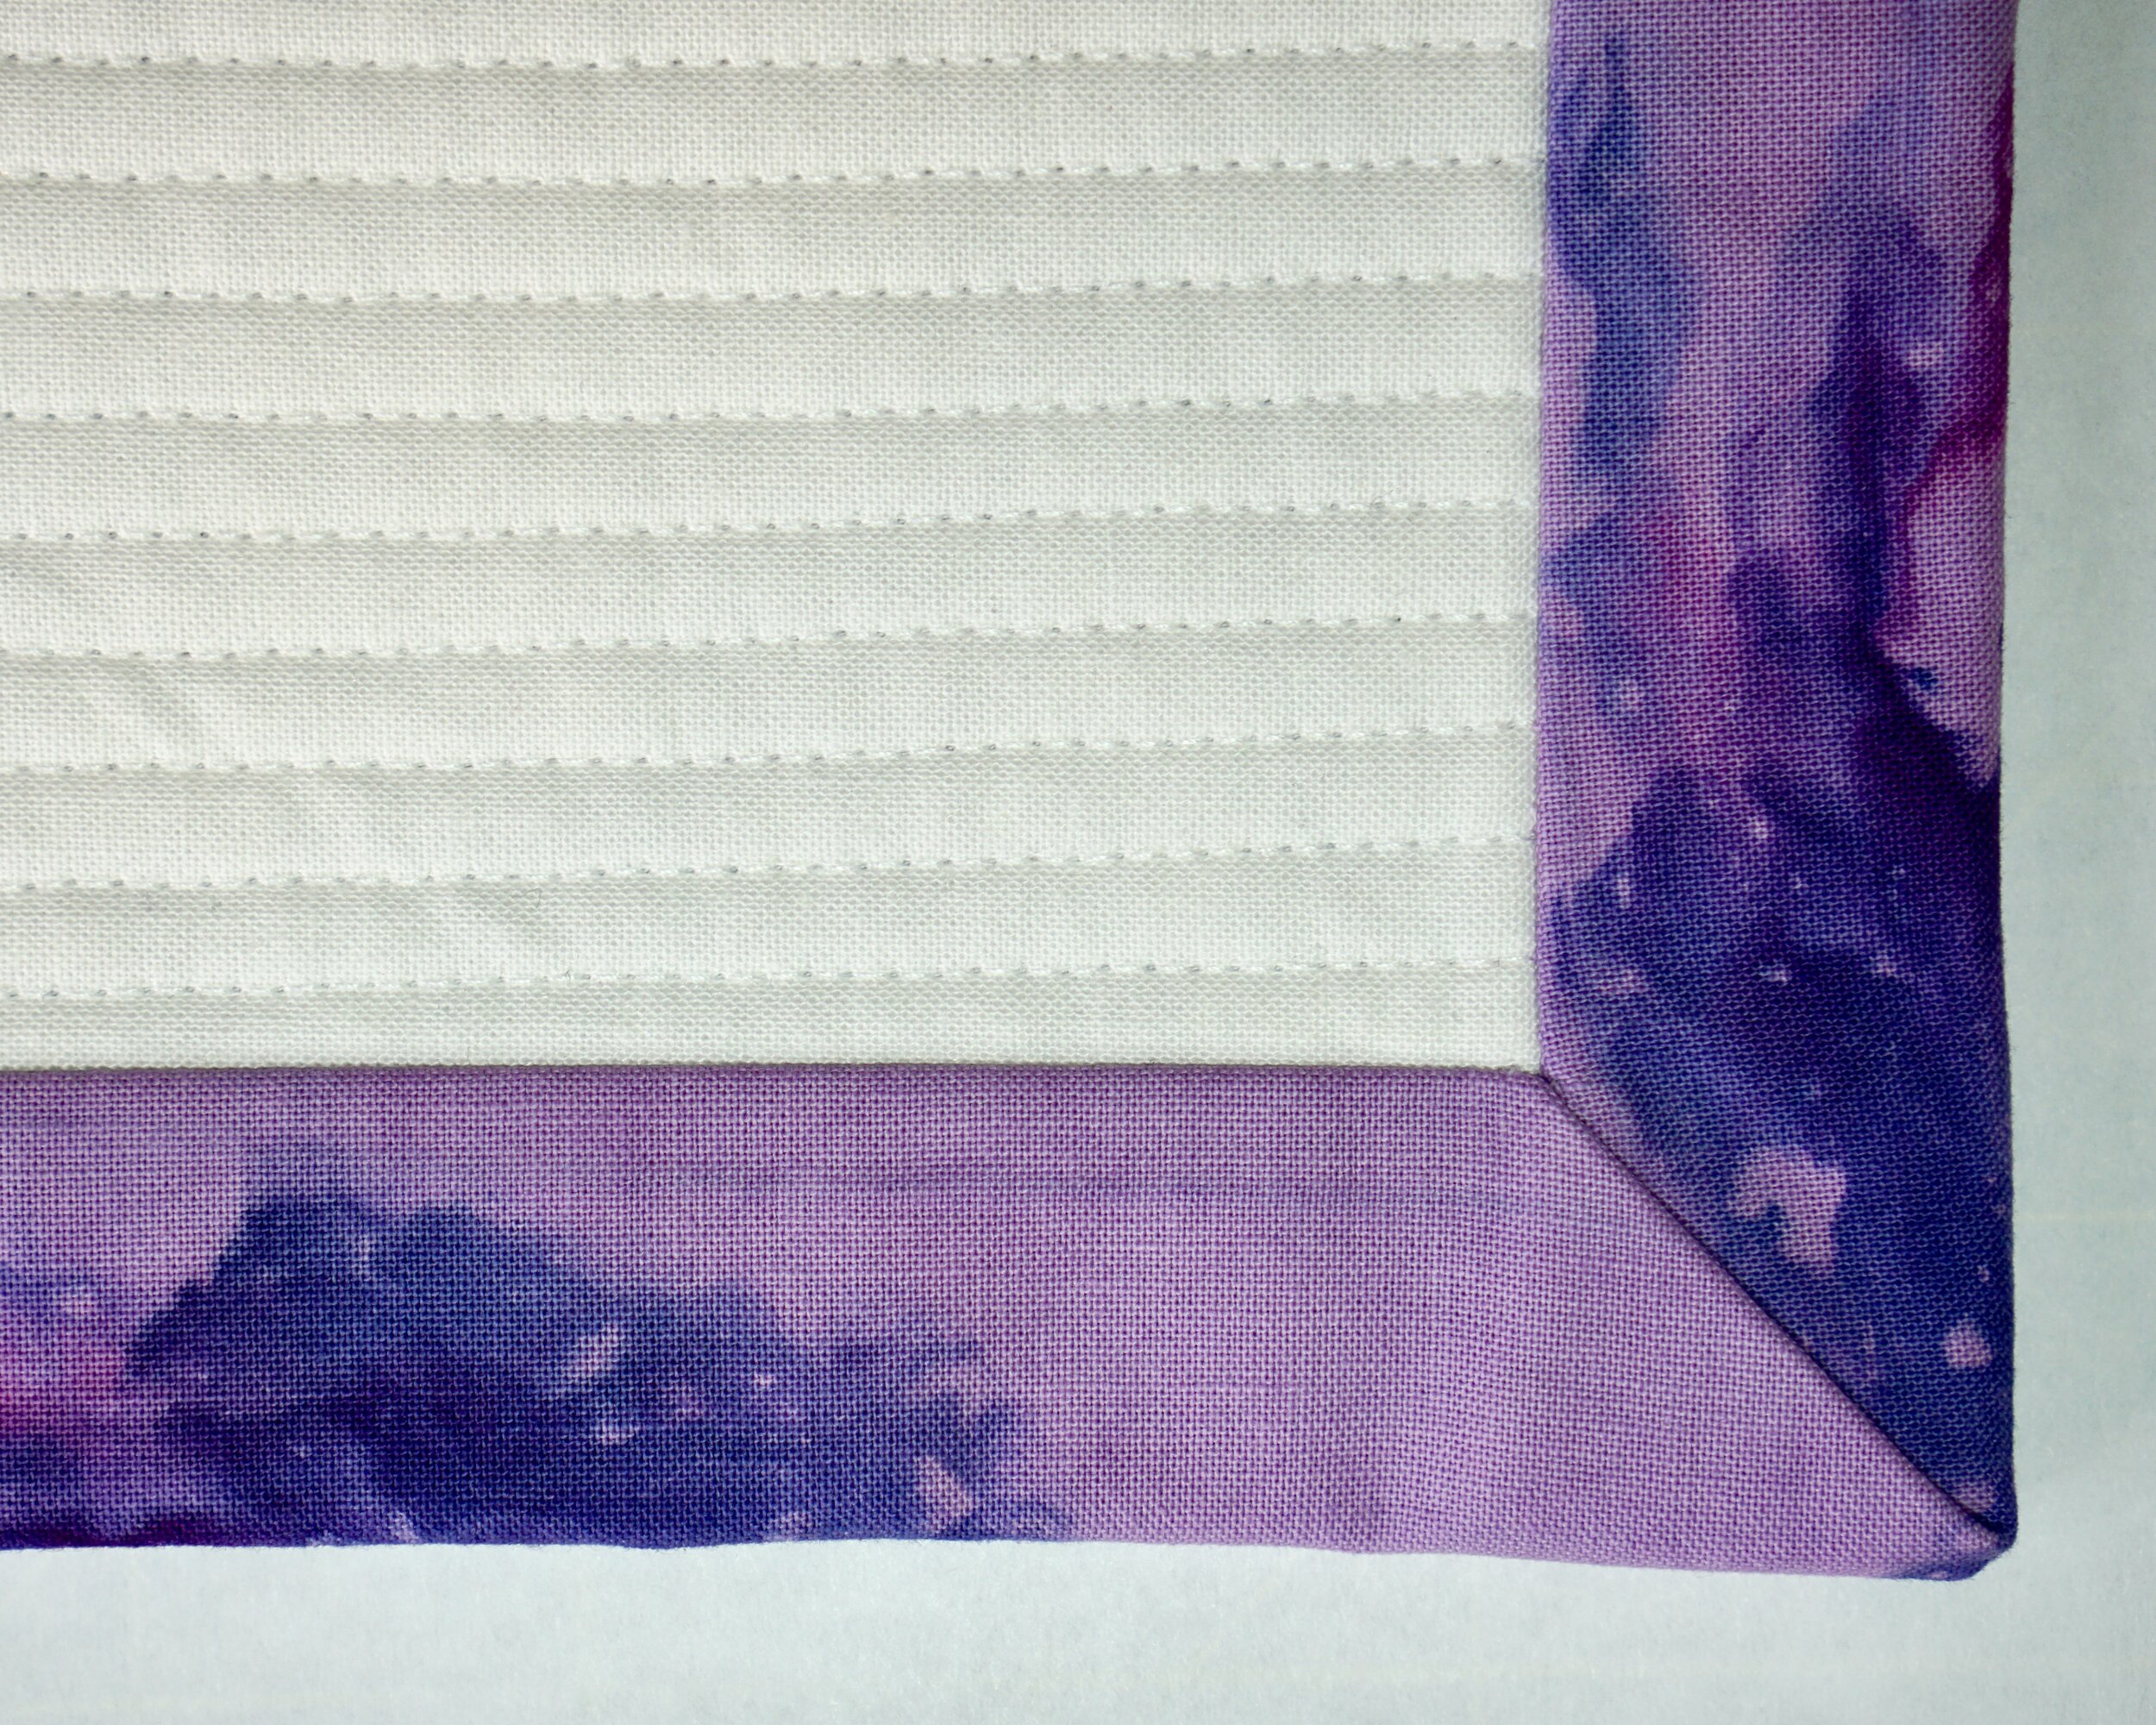
The below image is a reference you can use to compare to four corners of your quilt. This sample is quite small, so normally the corners wouldn’t appear so crowded.

Step 12: Press the binding away from the quilt top.


Step 13: Begin the fold the binding around to the back of the quilt.


Step 14: Press the binding to the back of the quilt taking care to form and press the mitered corners.


Step 15: Pin the mitered corners into place.


Step 16: Hand stitch the binding in place. Continue the hand stitching into the mitered corner to hold everything in place. Alternatively, glue baste the binding to the back (ensuring it extends past the seam line where the binding was stitched to the front), and stitch in the ditch from the front of the quilt to catch the back binding in the seam. Using this method, I’d still recommend to hand stitch to secure the mitered corners.
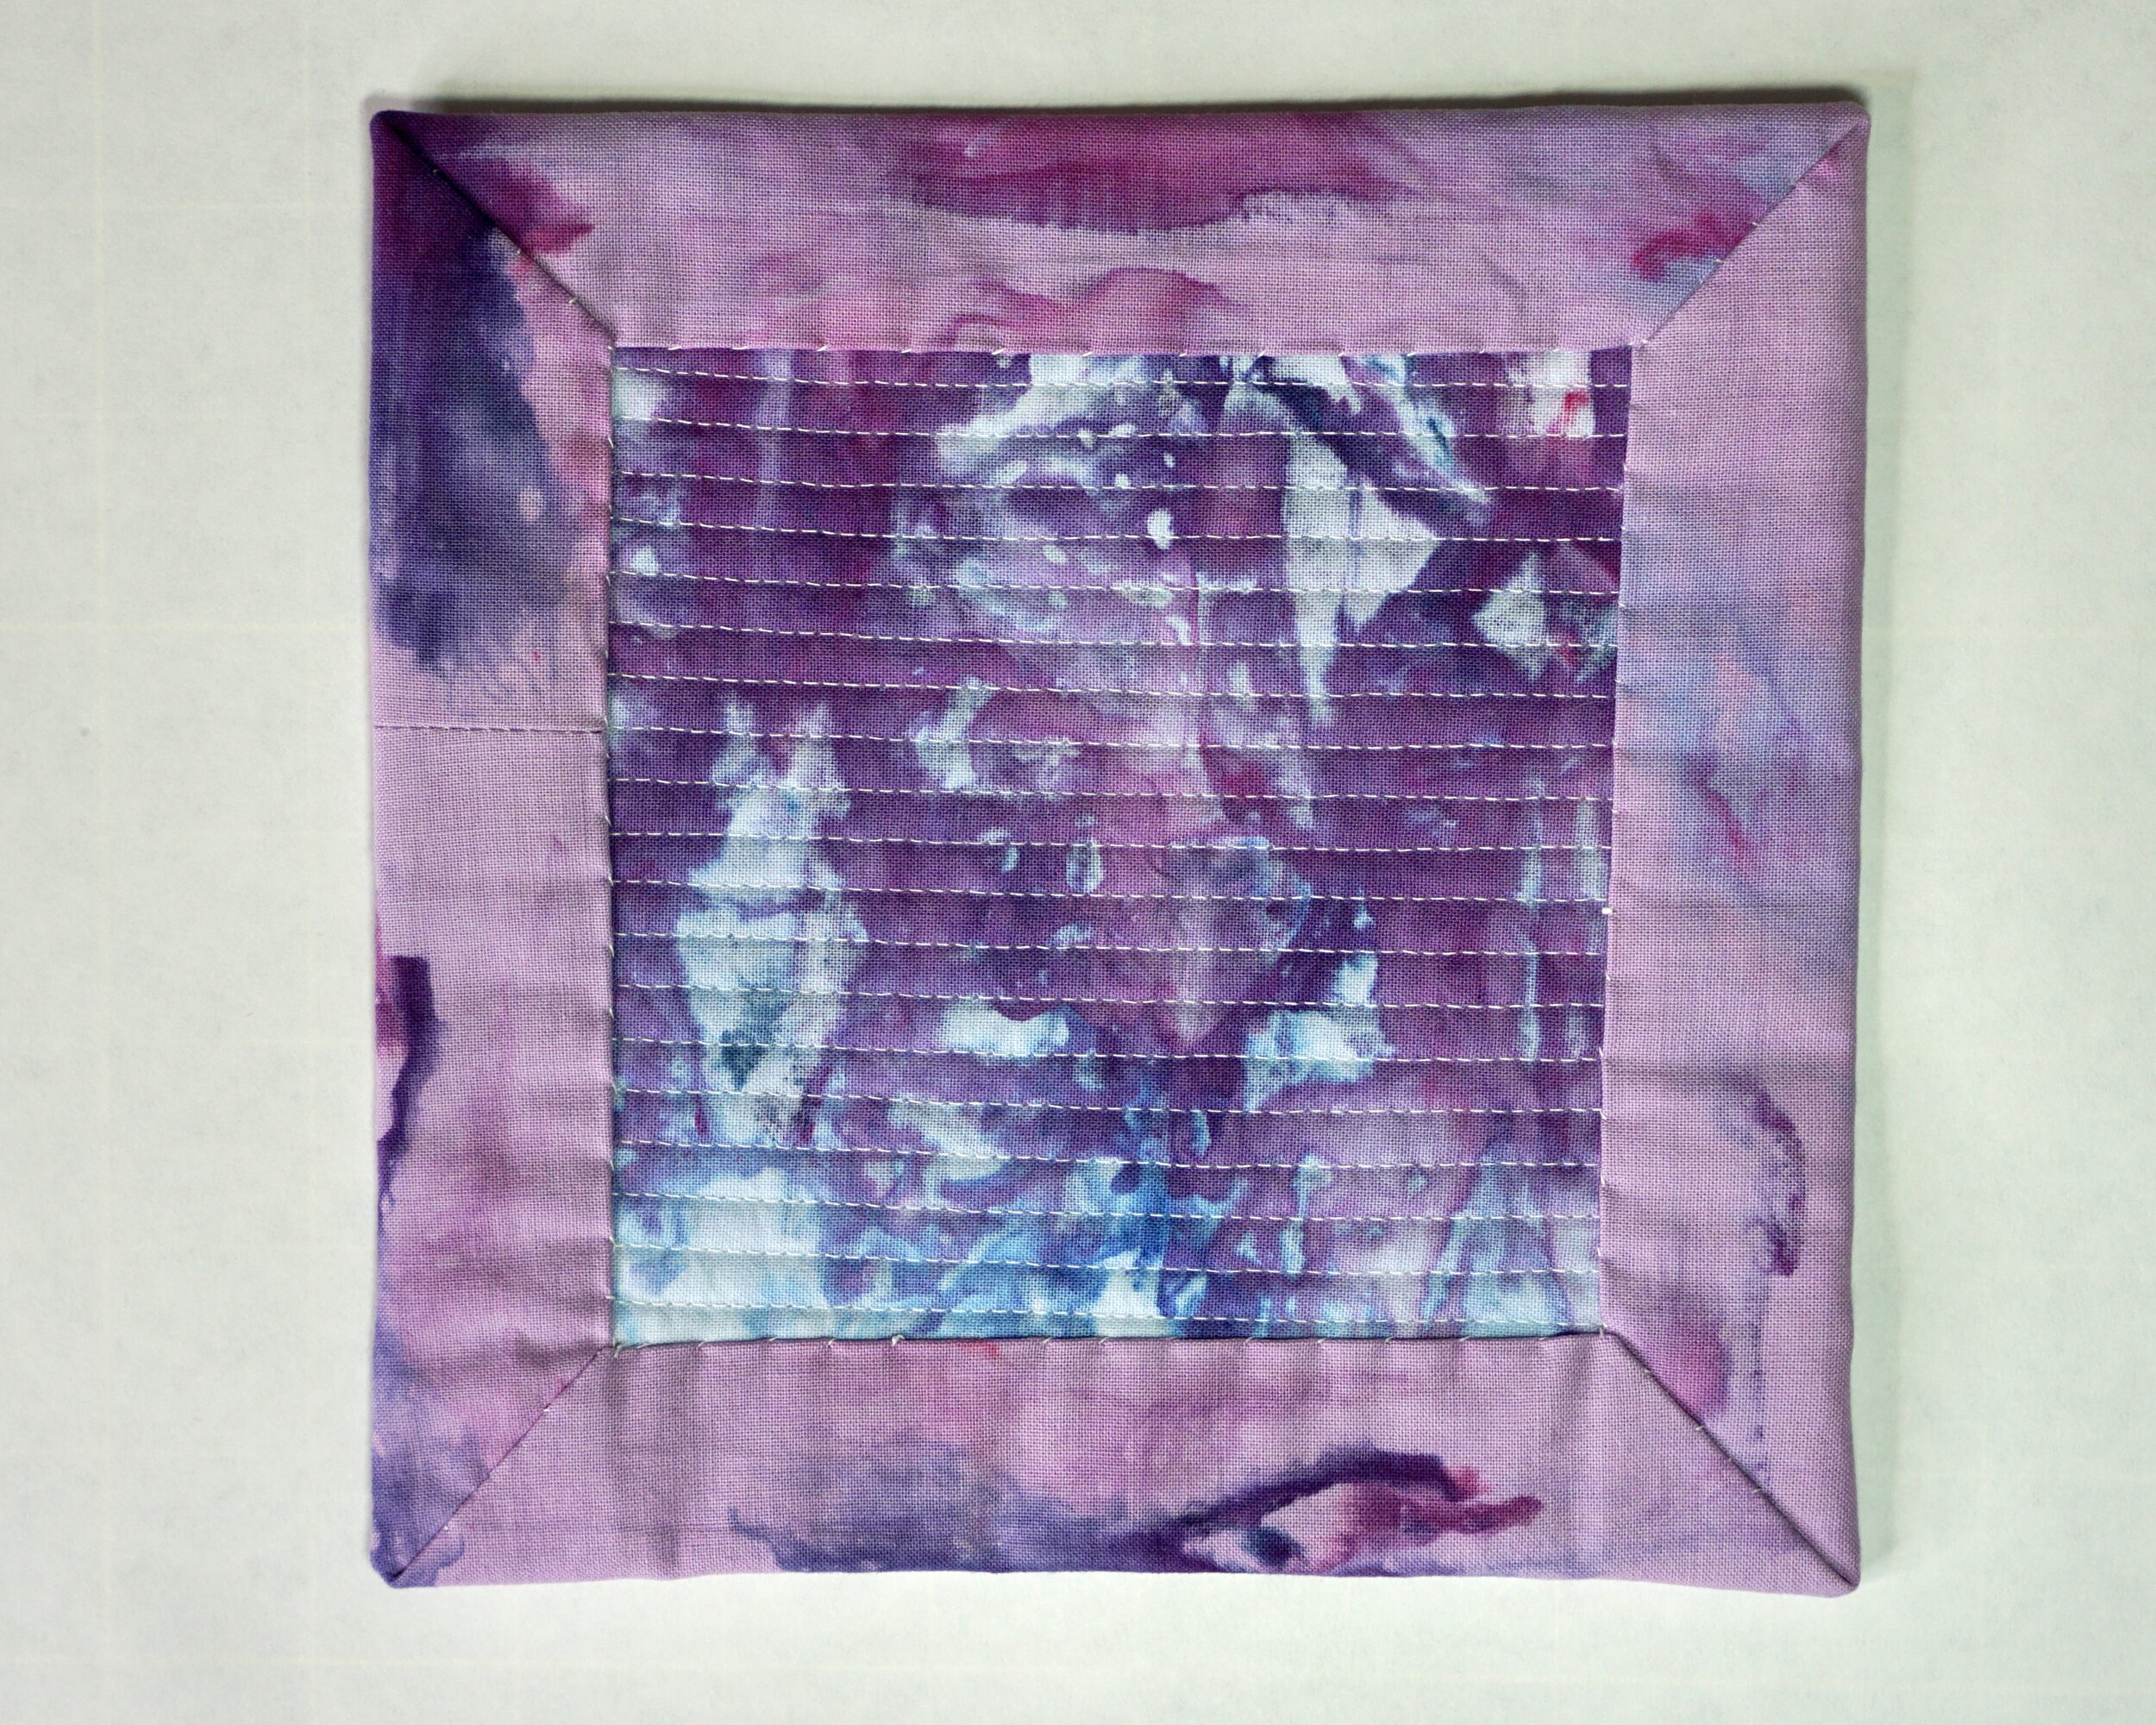
Here’s one last glamour shot of the finished wide binding! Cheers!
Materials used/pictured: Kona Snow, Kona PFD dyed by me! Batting is Warm and White. Thread is my favorite, Aurifil color 2021.